Menus documentation
Menus documentation
Build the menu
To create the menu of your website go to WordPress menu > Apparence > Menus and create a new menu. The left area show you all the possible menu items that you can insert in your menu, the right area is your final menu, you will add the items by drag and drop the items of left area to the right area. When you are done and all the menu items are in the right area you can save the menu by click on blue button Save menu.
To set the menu as main menu, the menu usually placed on top of your website, select Header Menu on Menu settings box on bottom. To set the menu as footer menu, the menu usually placed on bottom of your website, select Footer Menu on Menu settings box on bottom.
To set the menu as secondary top menu of main menu, the menu usually placed on top of your website, before the main menu, select Top Menu on Menu settings box on bottom, top menu area must be activated from WordPress menu > Apparence > Theme options > Menu. Go to HTML documentation for live preview and advanced customizations.
Menu item types
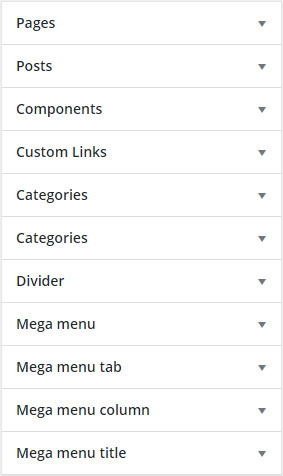
- Pages All the pages of your website
- Posts All the blog post of your website
- Your lists Your custom lists - post types, this field will show the items of your list, in the left image are the components
- Custom links Custom links are links not related to any page or item, you will insert manually the link
- Categories All the categories of your blog and lists, there is one category box for the blog and one category box for every list
- Divider Add a line between the menu items
- Mega menu Add a mega menu, go to mega menu section for more details
- Mega menu tab Add a tab to a mega menu, go to mega menu section for more details
- Mega menu column Add a column to a mega menu tab, go to mega menu section for more details
- Mega menu title Add a title to a mega menu column, go to mega menu section for more details
If you not see the menu items or you not see the lists menu items click on top right button Screen options and check the items to show.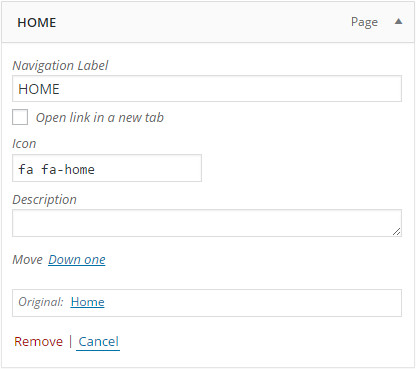
Single item settings
Add a menu item to your menu by drag and drop the item of left area to the right area and click over his name to open it.
- Navigation Label Menu item name
- Icon and classes Menu item icon and css classes, add classes separated by space, you can combine the icon with custom classes. Icons are supported only by icons menu and icons list dropdown
- Description Menu subtitle, only for subtitle menu
- URL Menu link, only for custom links
If you not see the menu items or you not see the lists menu items click on top right button Screen options and check the items to show.Dropdown menus
You can insert 3 dropdown types: classic dropdown menu, icons list, mega menu with tabs
Classic dropdown menu
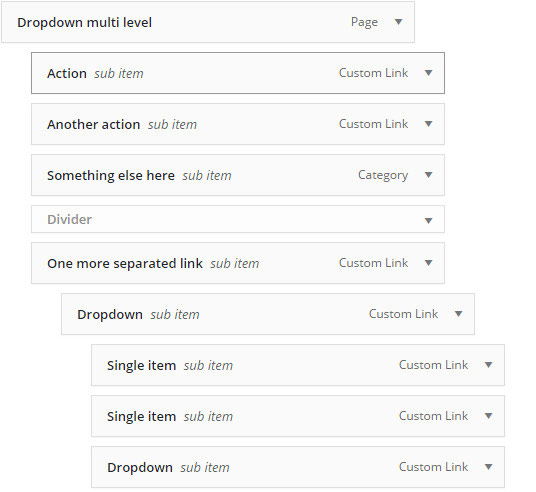
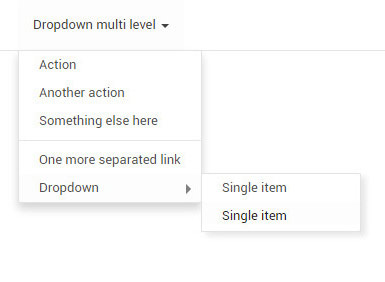
To create a dropdown menu insert a parent menu item, usually a Custom link with URL text: #, this is the parent menu item that will show the sub items on mouse hover, now insert the child items, must be nested into the parent item, like showed in the image. You can create up to 2 dropdown levels.
Admin
Front-end
Icons list dropdown
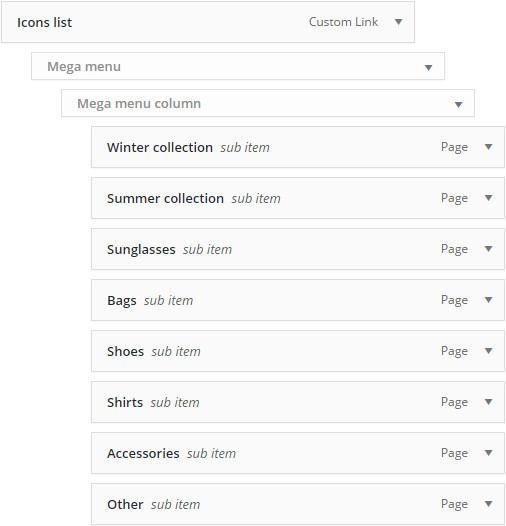
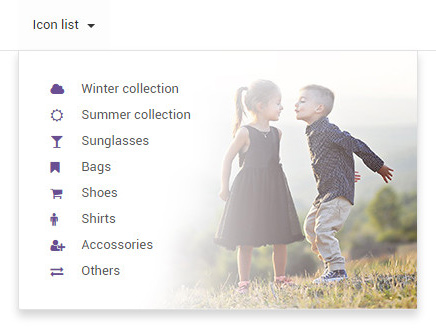
To create a icons list menu insert a parent menu item, usually a Custom link with URL text: #, this is the parent menu item that will show the sub items on mouse hover, now insert the menu type Mega menu, select a background image if you want and select Small width dropdown. Now add the menu type Mega menu column and into it insert the menu items, after insertion you can select the icons of every item. Menu items must be nested as showed in the image.
You can add multiple columns add add multiple menu types Mega menu column, all must be nested under Mega menu parent item.
You can add multiple columns add add multiple menu types Mega menu column, all must be nested under Mega menu parent item.
Admin
Front-end
Mega menu with tabs
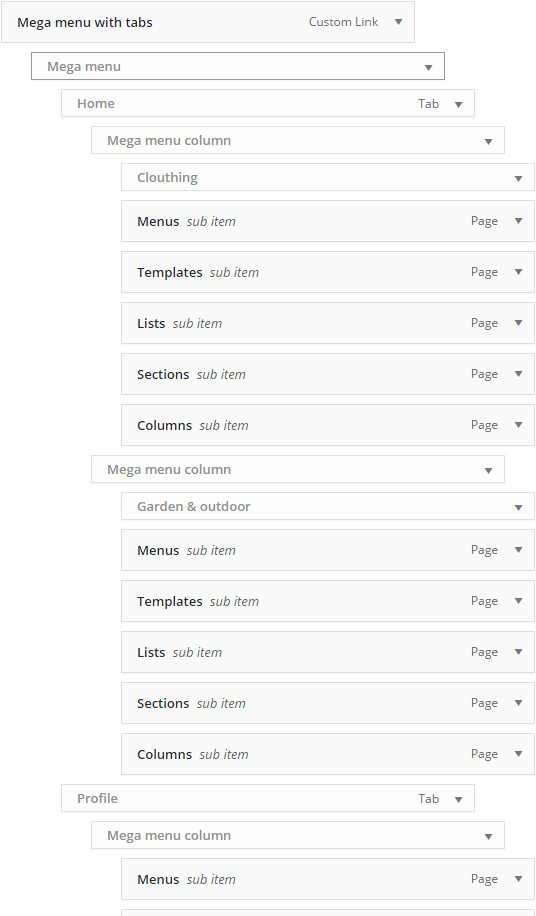
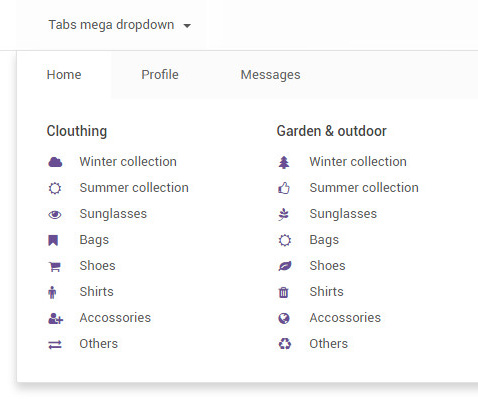
To create a mega menu with tabs insert a parent menu item, usually a Custom link with URL text: #, now insert the menu type Mega menu, select a background image if you want use it, add the menu type Mega menu tab and into it add the mega menu column. Now you can insert the menu items, after insertion you can select the icons of every item. Menu items must be nested as showed in the image. To insert the columns title add the menu item Mega menu title in the position you want, as showed in the images.
Admin
Front-end
Menu settings
Go to Apparence > Theme options > Menu to manage the settings of your menu.
Menu types
- Menu subline To create a subline menu add the parent menu item and into it the childs menu items
- Menu subtitle Insert the subtitle in the Description field of menu item
- Menu middle logo You can put the logo on top by select the Top logo option on Menu settings page, use Menu margin left setting the adjust the position, you must upload the Secondary logo on Y | Theme settings
- Menu middle box You can insert the middle box contents on Menu settings page, currently you need to insert custom codes
- Menu icons Insert the icons in Icons field of menu item. You can set lateral or top icons by select the Menu top icons option on Menu settings page
- Side menu Go to side menu options below for more informations
Global options
- Menu animation Dropdown menus animation.
- Transparent menu Transparent background with other design changes.
- One page Activate it for one page and full page menu websites.
- Search box Show a search box.
- Social icons Show the social icons, you can set it on Social and API tab of Theme options panel.
- Menu height Set the height of menu.
- WPML Lan menu Show the language menu, require WPML plugin, check translations documentation for more details.
- Custom area content You can insert here what you want.
- Logo height Set the main logo height of menu. In pixels.
Horizontal menu options
- Wide menu Full width menu.
- Menu position Menu position.
- Fixed top Menu is always visible on top.
- Centered Set center menu.
- Full width mega menu Set full width sizes for the dropdown mega menu.
- Columns top padding Top padding of the columns of the mega menu.
- Menu height Set the menu height. *Only for horizontal menus.
Side menu and other menu types options
- Hamburger menu Hide the menu and add a button for show it
- Lateral dropdown Dropdown menus open like a classic dropdown menu
- Columns top padding Top position of mega columns contents
- Top logo Show the logo above the menu, on top of the page. *Only for middle logo menu.
- Top icons Change the icons position of icons menu from left to top. *Only for icons menus.
- Middle box content Insert every HTML you want, you can copy the code blocks of framework-y.com and paste theme here. *Only for middle box menus
- Menu margin left Menu margin left, use this option for centered logo menus.
One page menu
- 1Go to WordPress menu > Apparence > Theme options and on menu tab select one page menu, save the settings.
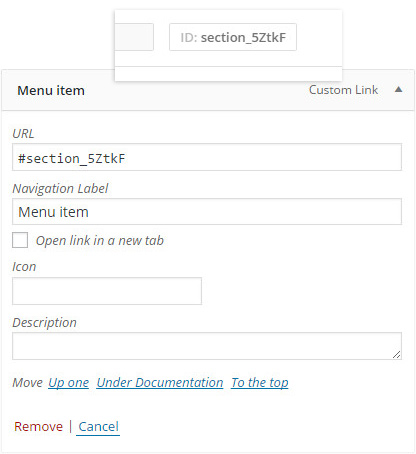
- 2Go to your page that will use the one page menu, every section and column have a ID (ex. section_K8ds0), you can get it by click the icon on top right.
- 3Go to WordPress menu > Apparence > menus, select your menu, add a the menu item Custom Link, and on URL insert #ID, where ID is the id of the section or column (ex. section_K8ds0).
FullPage menu
- 1Go to WordPress menu > Apparence > Theme options and on menu tab select one page menu, save the settings.
- 2Go to WordPress menu > Apparence > menus, select you menu, add a the menu item Custom Link, and on URL insert #section-0 for first full page section,#section-1 for second full page section ....
For combined menus, full page + classic links to other pages, disable one page menu from Apparence > Theme options and add the full URL to the menu items URL, replace #section-1 with http://www.yoursite.com/#section-1 ....
Translations
Translate the menus require WPML, go to translations documentation for more details.
If WPML is active follow these steps to translate the menus:
If WPML is active follow these steps to translate the menus:

